


Introducing Climate SvelteKit Blog Starter #
This SvelteKit Blog starter is based on the existing Climate Gatsby MDX blog
starter. Apart from being built for SvelteKit instead of Gatsby, the other big
(related) difference is that it supports blog posts written in markdown files
containing Svelte code (MDsvex), while the Gatsby version supported MDX (JSX
in markdown). Markdown support for blog authoring is quite a handy feature.
There is a shorthand notation which helps you get your thoughts down quicker
compared to more formal HTML. As an example, for a heading in HTML you write <h1>My heading</h1>, while in Markdown you write # My heading.
There are similar shorter equivalents for writing lists, adding links, pictures and so on . All in all, it means you spend less time tracking a missing close tag and
can focus on the task at hand. On top, MDsveX makes customizing blog posts a
lot easier.
About SvelteKit #
If you are completely new to SvelteKit, it might be worth skimming through my recent post on Getting Started with SvelteKit, which will give you a head-start. That said, I have built the starter to help you get up to speed quicker if you are still discovering SvelteKit. In this post, I outline some key features. If you're more of a hands-on person, just crack open the SvelteKit Blog Starter repo and start playing!
In this post, rather than go through how I built the starter, to help get you going quicker with SvelteKit, I'll run through the most important parts of configuration. As it's based on the Gatsby equivalent, I can also point out some differences. My hope is that you can hit the ground running with help from the starter. We will start looking at what's inside the repo and where you put your own blog posts. Finally, we'll end up with a comparison of Gatsby and SvelteKit, with a look at Server Side generation vs. Static Site Generation thrown in on the journey. If that sounds good to you, let's crack on! If you would find a post on building something like this from scratch useful, do let me know.
🚀 Quick Start #
To get going you will clone the repo, install and spin up a dev server:
git clone https://github.com/rodneylab/sveltekit-blog-mdx.gitcd sveltekit-blog-mdxnpm installnpm run dev
You can run pnpm install instead of npm install if you have pnpm set up.
🧐 What’s Inside? #
.├── README.md├── jsconfig.json├── netlify.toml├── package.json├── pnpm-lock.yaml├── src│ ├── app.html│ ├── content│ │ └── blog│ │ ├── best-medium-format-camera-for-starting-out│ │ ├── folding-camera│ │ └── twin-lens-reflex-camera│ ├── global.d.ts│ ├── hooks.server.js│ ├── lib│ │ ├── assets│ │ │ ├── blog│ │ │ └── home│ │ ├── components│ │ │ ├── BannerImage.svelte│ │ │ ├── ...│ │ │ └── SEO│ │ ├── config│ │ │ └── website.js│ │ ├── constants│ │ │ └── entities.js│ │ ├── styles│ │ └── utilities│ │ └── blog.js│ ├── routes│ │ ├── +error.svelte│ │ ├── +layout.js│ │ ├── +layout.svelte│ │ ├── +page.js│ │ ├── +page.svelte│ │ ├── [slug]│ │ │ ├── +layout.svelte│ │ │ ├── +page.js│ │ │ └── +page.svelte│ │ ├── contact│ │ │ └── +page.svelte│ │ ├── manifest.webmanifest│ │ │ └── +server.js│ │ └── sitemap.xml│ │ └── +server.js│ └── service-worker.js├── static│ ├── apple-touch-icon.png│ ├── favicon.ico│ ├── ...│ └── robots.txt├── svelte.config.js└── vite.config.js
src #
src #-
hooks.server.jswe define Content Security Policy (CSP) and other HTTP security headers in here. More on this later.
src/lib/components #
src/lib/components #-
src/lib/componentsthese are the components we use in pages.
src/lib #
src/lib #-
src/lib/config/website.jsfor convenience we define properties for the site here such as the site title, contact email addresses and social media accounts. Some properties feed from environment variables. See the earlier post on getting started with SvelteKit for more on environment variables in SvelteKit.
-
src/lib/stylesdoes what you expect! We use SCSS for styling and source self-hosted fonts in the layouts (we'll see this further down the post).
src/lib/utilities #
src/lib/utilities #-
src/utilities/blog.jsthis file contains some code for helping us transform the markdown in blog posts to Svelte. As well as that, they help extract fields in the front matter (this is the metadata we include at the top of the blog postindex.mdfiles).
src/routes #
src/routes #-
src/routes/[slug]this folder contains templates for Svelte pages and backend logic for blog posts.
I mention most of the other files in the Getting Started with SvelteKit blog post, but let me know if I have missed anything which needs more explanation. Next let's look at a blog post file.
🖋 Blog Posts #
Below is a fragment from one of the sample blog posts. The first section is
the front matter, mentioned earlier. For now the SEO content is bare-bones,
but in an upcoming post, I will run through generating SEO metadata for
OpenGraph, Twitter and SchemaOrg. In those posts, we will make more use of
post front matter to ensure we include data tailored for each post in the
page's metadata. This has a number of important uses from, having nice
pictures show up when your page is shared on Twitter, Telegram or other apps
to helping search engines understand what the page is about. The latter is
needed to improve your SEO ranking. For now, the most critical use is ensuring
we get the right banner image to appear, with expected alt text for each post.
If you are as keen on SEO as I am, you should read my post on SvelteKit SEO. As you might expect, the dates from front matter are used to sort posts in
the BlogRoll component.
---postTitle: 'Best Medium Format Camera for Starting out'focusKeyphrase: 'best medium format camera'datePublished: '2021-04-07T16:04:42.000+0100'lastUpdated: '2021-04-14T10:17:52.000+0100'seoMetaDescription: "Best medium format camera for starting out is probably a question at the front of your mind right now! Let's take a look."featuredImage: 'best-medium-format-camera-for-starting-out.jpg'featuredImageAlt: 'Photograph of a Hasselblad medium format camera with the focusing screen exposed'ogImage: ''ogSquareImage: ''twitterImage: ''categories: ''tags: ''--- ## What is a Medium Format Camera? If you are old enough to remember the analogue film camera era, chances are it is the 35 mm canisters with the track cut down the side that first come to mind. Shots normally had a 3:2 aspect ratio measuring 36×24 mm.
🌟 BlogPostSummary Component #
Speaking of the blog roll, BlogRoll is used to generate it. We generate one of these components for each blog post. I thought this would be an interesting component to look at to compare Svelte and React code. We want the user to be taken to the blog post when they click anywhere inside the component. So we want it to behave like a link. We also want to include the title and other information as links to the post. Later we might add links to similarly tagged posts within the component.
That's a lot of links! Semantically, you should not have an anchor tag enclosed in another anchor tag. This is what we would have is we used anchors for all the links mentioned just then. Instead, I engineered the component to have the look, feel, and behaviour expected by the user as well as being accessible.
I won't go into detail on the accessibility features here and why I used them. However, for the comparison, I will explain a little about the structure. You will see there is only one anchor tag (around the post title). For sighted users, though, to give the appearance of the link, we change the cursor to a pointer when the mouse is within the component. On top, we use JavaScript to take the user to the blog post when they click anywhere within the component. That helps us achieve the goal of having the component behave as expected by the user.
This behaviour is implemented using onClick event
handlers in the Gatsby (React) version. In the Svelte version, we on:mouseenter, on:mouseleave and on:mousedown inline handlers.
10 // TRUNCATED...11 const handleMouseEnter = (event) => {12 event.target.style.cursor = 'pointer';13 };14 15 const handleMouseLeave = (event) => {16 event.target.style.cursor = 'default';17 };18 19 const handleMouseDown = async () => {20 goto(`/${slug}/`);21 };22 23 const date = dayjs(datePublished);24 const dateString = `${date.format('D')} ${date.format('MMM')}`;25 const idString = `blog-post-summary-${slug}`;26 </script>27 28 <div29 class="container"30 on:mouseenter={handleMouseEnter}31 on:mouseleave={handleMouseLeave}32 on:mousedown={handleMouseDown}33 >34 <div class="content">35 <h3>36 <a aria-label={`Open ${postTitle} blog post`} aria-describedby={idString} href={`/${slug}/`}37 >{postTitle}</a38 >39 </h3>40 <p>{dateString}</p>41 <p>{seoMetaDescription}</p>42 <span id={idString} aria-hidden="true">Read more {H_ELLIPSIS_ENTITY}</span>43 </div>44 </div>
React equivalent — click to expand code.
1 const BlogPostSummary = ({2 frontmatter: { datePublished, postTitle, seoMetaDescription },3 slug,4 }) => {5 const containerNode = useRef();6 const titleNode = useRef();7 useEffect(() => {8 if (containerNode.current) {9 // deliberately set style with JavaScript and not CSS for accessibility reasons10 containerNode.current.style.cursor = 'pointer';11 }12 const listener = (event) => {13 if (containerNode.current && !titleNode.current.contains(event.target)) {14 navigate(`/${slug}`);15 }16 };17 containerNode.current.addEventListener('mousedown', listener);18 return () => {19 if (containerNode.current) {20 containerNode.current.removeEventListener('mousedown', listener);21 }22 };23 }, [containerNode, titleNode]);24 25 const date = dayjs(datePublished);26 const idString = `blog-post-summary-${slug.slice(0, -1)}`;27 28 return (29 <div className={container} ref={containerNode}>30 <div className={content}>31 <h3 ref={titleNode}>32 <Link33 aria-label={`Open ${postTitle} blog post`}34 aria-describedby={idString}35 to={`/${slug}`}36 >37 {postTitle}38 </Link>39 </h3>40 <p>{`${date.format('D')} ${date.format('MMM')}`}</p>41 <p>{seoMetaDescription}</p>42 <span aria-hidden id={idString}>43 Read more {H_ELLIPSIS_ENTITY}44 </span>45 </div>46 </div>47 );48 };
🔥 Static vs Server Side Rendered #
With SvelteKit you can choose to make pages Server Side Rendered, like Next
apps typically are, or static (Static Site Generated, SSG), like Gatsby apps
typically are. There is an excellent write up SSG by React guru Dan Abramov , worth the read, even if you already know about SSG. For SSG pages, the
SvelteKit Netlify adapter produces a serverless function which acts as the
server. I have made all pages in the starter static. This was done by adding
the @sveltejs/adapter-static package in svelte.config.js and also this export in `src/routes/+layout.js:
1 export const prerender = true;
🔧 Self Hosted Fonts #
Self-hosting makes the page load faster, saving the user's browser having to connect to a different origin to download the fonts it needs. In SvelteKit, it's not too different. Once again, we install the font packages, we just include them differently. In SvelteKt, we can add them to the default layout file if they are used throughout the site:
<script> // Lora - supported variants: // weights: [400, 500, 600, 700] // styles: italic, normal import '@fontsource/lora/400.css'; import '@fontsource/lora/600.css'; import '@fontsource/lora/700.css'; import '@fontsource/lora/700-italic.css'; // TRUNCATED...</script>
💄 SCSS Styling #
I'm a fan of SCSS so, we are using SCSS styling in the starter. There are a few things you need to do to get this to work in SvelteKit (this is all already done in the starter, just listed for information here):
-
Install the
sassand Svelte preprocessor packages:npm i -D sass svelte-preprocess -
Set up the Svelte preprocessor to convert SCSS into standard CSS:
svelte.config.jsjavascript1 /** @type {import('@sveltejs/kit').Config} */2 import adapter from '@sveltejs/adapter-netlify';3 import preprocess from 'svelte-preprocess';45 const config = {6 preprocess: preprocess({7 scss: {8 prependData: "@import 'src/lib/styles/styles.scss';"9 }10 }),11 // TRUNCATED...12 };
The file given in line
8can be used to include any variables which you want to expose to every style element. -
Define any global styles in the files in
src/lib/stylesdirectory. -
Import styles where components or pages require them:
src/routes/+layout.sveltesvelte<script>// TRUNCATED...import '$lib/styles/normalise.css';import '$lib/styles/index.scss';// TRUNCATED...</script>
-
Include SCSS where you would write regular CSS, specifying
scssas the language:src/routes/+layout.sveltesvelte94 <style lang="scss">95 .container {96 display: flex;97 flex-wrap: wrap;98 flex-direction: column;99 justify-content: space-between;100 padding: $spacing-4 $spacing-0 $spacing-0;101 margin: $spacing-0 auto;102 min-height: 100vh;103 }104 // TRUNCATED...Note how we can include SCSS variables now.
🔐 Content Security Policy #
A Content Security Policy can break your site or make it unusable, so it is
important to test the policy. Reporting is helpful here, and the starter is
set up to use Sentry reporting. They offer free reporting, suitable for many
use cases. You will need a free Sentry account and API keys for security error catching . Alternatively, remove the reporting lines from the src/hooks.js file.
CSP is set to report only in the starter by default. This means errors will
appear in the browser console and the reports will get sent to your Sentry
dashboard when there is an error (but no connections will be blocked). You
can test your HTTP security headers on securityheaders.com . Once you are happy with the policy, you should switch from Content-Security-Policy-Report-Only to Content-Security-Policy. Remember to
comment out the report only line when you do this.
To include Security headers, we can use the Svelte hooks handle . The hooks.server.js file is in the default
location, so you should not have to include it in svelte.config.js. The Climate SvelteKit Blog Starter SvelteKit config, includes it just
for completeness, though. You will almost certainly need to customize the
CSP HTTP headers in the hooks file for your application.
src/hooks.server.js — click to expand code.
// https://gist.github.com/acoyfellow/d8e86979c66ebea25e1643594e38be73// https://developer.mozilla.org/en-US/docs/Web/HTTP/CSP// https://scotthelme.co.uk/content-security-policy-an-introduction/// scanner: https://securityheaders.com/ const rootDomain = import.meta.env.VITE_DOMAIN; // or your server IP for dev const directives = { 'base-uri': ["'self'"], 'child-src': ["'self'"], 'connect-src': ["'self'", 'ws://localhost:*'], 'img-src': ["'self'", 'data:', import.meta.env.VITE_IMGIX_DOMAIN], 'font-src': ["'self'", 'data:'], 'form-action': ["'self'"], 'frame-ancestors': ["'self'"], 'frame-src': ["'self'"], 'manifest-src': ["'self'"], 'media-src': ["'self'", 'data:'], 'object-src': ["'none'"], 'style-src': ["'self'", "'unsafe-inline'"], 'default-src': ["'self'", rootDomain, `A;ws://${rootDomain}`A;], 'script-src': ["'self'", "'unsafe-inline'"], 'worker-src': ["'self'"], 'report-to': ["'csp-endpoint'"], 'report-uri': [ `A;https://sentry.io/api/${import.meta.env.VITE_SENTRY_PROJECT_ID}/security/?sentry_key=${ import.meta.env.VITE_SENTRY_KEY }`A; ]}; const csp = Object.entries(directives) .map(([key, arr]) => key + ' ' + arr.join(' ')) .join('; '); export async function handle({ event, resolve }) { const response = await resolve(event); response.headers.set('X-Frame-Options', 'SAMEORIGIN'); response.headers.set('Referrer-Policy', 'no-referrer'); response.headers.set( 'Permissions-Policy', 'accelerometer=(), autoplay=(), camera=(), document-domain=(), encrypted-media=(), fullscreen=(), gyroscope=(), interest-cohort=(), magnetometer=(), microphone=(), midi=(), payment=(), picture-in-picture=(), publickey-credentials-get=(), sync-xhr=(), usb=(), xr-spatial-tracking=(), geolocation=()', ); response.headers.set('X-Content-Type-Options', 'nosniff'); /* Switch from Content-Security-Policy-Report-Only to Content-Security-Policy once you are satisifed policy is what you want * on switch comment out the Report-Only line */ response.headers.set('Content-Security-Policy-Report-Only', csp); // response.headers.set('Content-Security-Policy', csp); response.headers.set('Strict-Transport-Security', 'max-age=31536000; includeSubDomains; preload'); response.headers.set( 'Expect-CT', `max-age=86400, report-uri="https://sentry.io/api/${ import.meta.env.VITE_SENTRY_PROJECT_ID }/security/?sentry_key=${import.meta.env.VITE_SENTRY_KEY}"`, ); response.headers.set( 'Report-To', `{group: "csp-endpoint", "max_age": 10886400, "endpoints": [{"url": "https://sentry.io/api/${ import.meta.env.VITE_SENTRY_PROJECT_ID }/security/?sentry_key=${import.meta.env.VITE_SENTRY_KEY}"}]}`, ); return response;}
As it stands, the generated sites get an A rating from SecurityHeaders.com.
It should be possible to improve this by adding hashes for all inline styles
and scripts and removing unsafe-inline. I
will look into how to do this when I get a chance! If you have already
written a custom script to handle it, I would love to hear from you!
For a more comprehensive look at CSP with SvelteKit, see the SvelteKit Content Security Policy post.
🖼 Responsive Images #
One area where Gatsby is still ahead of Svelte is on responsive images. I
guess we have to wait a little for someone smart to write something like the
Gatsby Image API for SvelteKit. In the meantime, I have cobbled together a
responsive image component using Imgix for hosting. You will need an Imgix
account and to have your images in the cloud somewhere (e.g. AWS S3 or
Backblaze) for this to work for you. As normal, place your credentials in
the .env file (see .env.EXAMPLE for a template).
Imgix generates images in the best format based on the user's browser. Their
CDN serves images around the globe with haste. The BannerImage component is able to query Imgix for the image url and srcset to create a responsive image. As a temporary hack, I have manually generated
these data so that the entire site can be static (this is related to the Netlify
adapter issue mentioned earlier). If you also want to keep your site static, you
have a choice of either also generating the data manually (or with a script) or
using an alternative method for generating images.
🗳 Poll #
⚖️ Gatsby — SvelteKit Comparison #

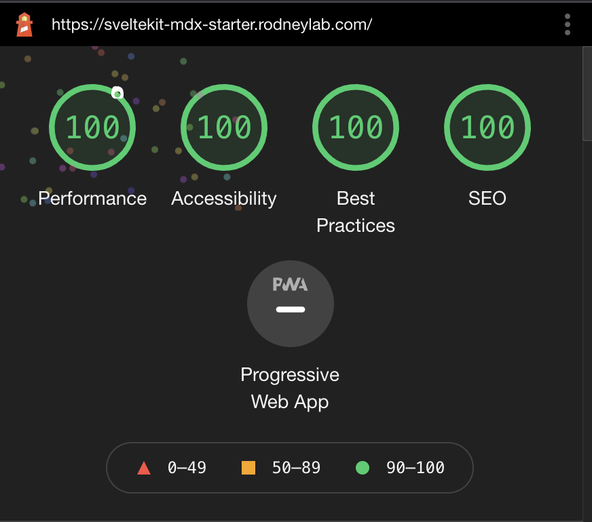
So now you have a choice between two starters for your next markdown-based blog site Gatsby Starter Climate and SvelteKit Blog Climate — which do you choose? You might say go on speed. Well the Lighthouse test shows them both getting clean sheets with 100s across the board! Gatsby does have some optimizations built in, with links preloading, but then Svelte sites run pure JavaScript, so you would expect them to load slightly quicker (I admit I am no expert on this matter). So on speed, there is probably not much in it. If speed is critical for your project, it will definitely be worth doing the research.
I would say in time SvelteKit will offer the better developer experience, that's not to say that it is not already outstanding! Builds are a lot faster (the Svelte starter builds in around 40 seconds consistently on Netlify, compared to a range of between one minute and three-and-a-half minutes for the Gatsby starter). For bigger sites, I would imagine the difference will have an impact, especially when you have to pay per build minute.
Gatsby is more established so already has a large ecosystem of plugins and on top there are all the React plugins. I think this gives Gatsby the advantage now if you need to build a new site quickly or generally rely on plugins. I would expect the Svelte ecosystem to grow. As it does, there will probably be clear water appearing between the two on developer experience. With that in mind, it is probably worth learning Svelte and SvelteKit to future-proof yourself. This is especially the case if you do not heavily rely on plugins for the sites you build, and like to roll your own components.
🙏🏽 Feedback #
Please send me feedback! What do you think of the new starter? I mentioned a few improvements I have in mind. I would also love to hear your opinion on how we can improve it. Have you found the post useful? Would you like to see posts on another topic instead? Get in touch with ideas for new posts. Also, if you like my writing style, get in touch if I can write some posts for your company site on a consultancy basis. Read on to find ways to get in touch, further below. If you want to support posts similar to this one and can spare a couple of dollars, rupees, euros or pounds, please consider supporting me through Buy me a Coffee.
Finally, feel free to share the post on your social media accounts for all your followers who will find it useful. As well as leaving a comment below, you can get in touch via @askRodney on Twitter and also askRodney on Telegram . Also, see further ways to get in touch with Rodney Lab. I post regularly on SvelteKit as well as Gatsby JS among other topics. Also, subscribe to the newsletter to keep up-to-date with our latest projects.